I have watched a lab lose three days of work because a 9 mm short-thread vial was capped with a 9 mm wide-mouth closure. The caps torqued down fine. The septa looked seated. The autosampler needle, however, hit the plastic shoulder instead of the septum center on every third injection, bent, and the run aborted. Nobody noticed until the sequence was half gone. That is the moment I stopped treating vials as a commodity line item and started writing selection specs the way I write column specs.
This guide is what I hand to new buyers and to lab managers who inherited a vial inventory nobody can explain. It covers the glass, the closure, the septum, the dimensional standards that actually matter, and the numbers you need on a purchase order so the next delivery works the way the last one did.
A vial is a small reaction vessel, a storage container, and a precision mechanical interface all at once. The autosampler grips it, lifts it, sometimes pierces it, sometimes heats it, and the detector reads whatever chemistry happened inside it. Get the glass chemistry wrong and you get adsorption losses on basic analytes. Get the dimensions wrong and you get needle strikes or failed tray picks. Get the septum wrong and you get coring, ghost peaks, or a slow leak that shows up as drifting retention time at hour six of a 96-injection sequence.
USP <1058> and the general chapters on analytical instrument qualification treat the sample container as part of the measurement system, not an accessory. That framing is correct. I have seen a 12% drop in recovery for a low-concentration amine standard simply by moving from untreated borosilicate to a properly deactivated glass vial. Same method, same column, same instrument. The vial was the variable.
The dimensional standards you must specify
Most HPLC work worldwide runs on the 12 x 32 mm vial. That is 12 mm outer diameter and 32 mm from the base to the top of the crimp or thread finish. Within that envelope there are several distinct geometries, and they are not interchangeable even when the catalog photos look identical.
12 x 32 mm configurations
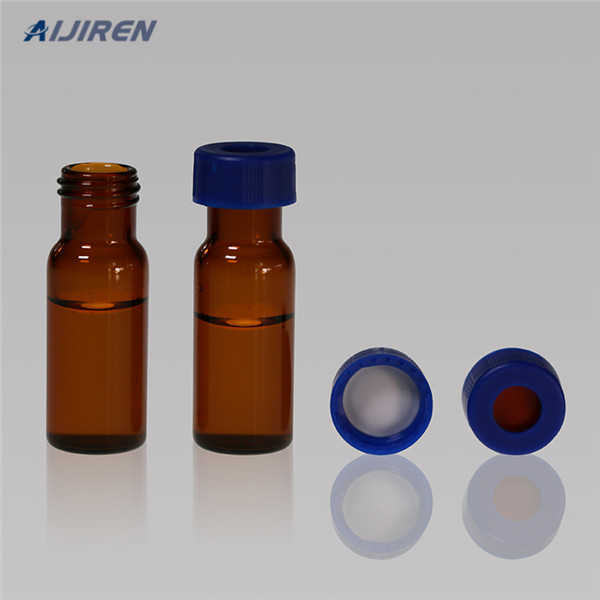
- 9 mm short-thread (screw top): the thread sits low on the neck. Closure is a 9 mm screw cap. This is the most common configuration in modern autosamplers.
- 9 mm wide-mouth: same 9 mm cap, but a wider opening (typically 6.0 mm ID versus about 4.6 mm on narrow-mouth). Easier for pipette tips and for micro-volume inserts.
- 11 mm crimp: aluminum crimp seal over an 11 mm septum. Still standard on many older Agilent and Waters systems.
- 10-425 and 8-425 thread: older thread standards, common on GC and some European autosamplers. A 10-425 cap will not fit a 9 mm vial, and forcing it damages both.
The number before the dash is the thread diameter in millimeters; the number after is the thread pitch in millimeters. A 9 mm cap has a 9 mm thread diameter. If your purchase order does not state the thread standard, you are relying on the supplier’s assumption, and suppliers assume wrong.
Glass dimensions that affect the autosampler
The two measurements I check on every incoming lot are the outer diameter and the height from base to crimp/thread shoulder. For 12 x 32 mm vials, the OD tolerance should hold within ±0.2 mm and the height within ±0.3 mm. Beyond that, tray grippers start to slip and needle depth calibration drifts. I have measured lots where the OD ran 12.4 mm and the vial jammed in a 12.2 mm tray well. The supplier called it “within manufacturing tolerance.” The autosampler called it a fault.
Ask for the dimensional certificate with the lot. Reputable manufacturers publish OD, ID, height, and neck finish on the certificate of analysis. If they cannot produce one, that is your answer about their process control.
Glass type and surface chemistry
Almost all HPLC vials are made from Type I borosilicate glass (USP Type I, ASTM E438). That is the baseline. The differences that matter are in how the surface is treated after forming.
Untreated glass
Untreated borosilicate has a slightly acidic, silanol-rich surface. It works fine for neutral and acidic analytes at moderate concentration. It is a poor choice for basic compounds at low concentration, because protonated amines bind to the silanol groups. If you are running a method at the low nanogram-per-milliliter level for a basic drug, untreated glass will cost you recovery.
Deactivated and silanized glass
Deactivation coats the interior with a hydrophobic or inert layer that blocks silanol activity. For basic analytes, especially at low concentration, this is not optional. I specify deactivated glass for any method where the target is below about 10 ng/mL and the analyte has a pKa above 7. The cost premium is typically 15 to 30 percent over untreated, and it buys back recovery you cannot otherwise recover post-run.
Amber glass
Amber glass blocks UV and visible light below roughly 500 nm. Use it for photosensitive compounds: certain vitamins, some antibiotics, and a long list of natural products. Amber does not change the surface chemistry, so if you need both light protection and deactivation, specify amber deactivated glass. It exists, and it costs more, and it is worth it.
Clear glass and inspection
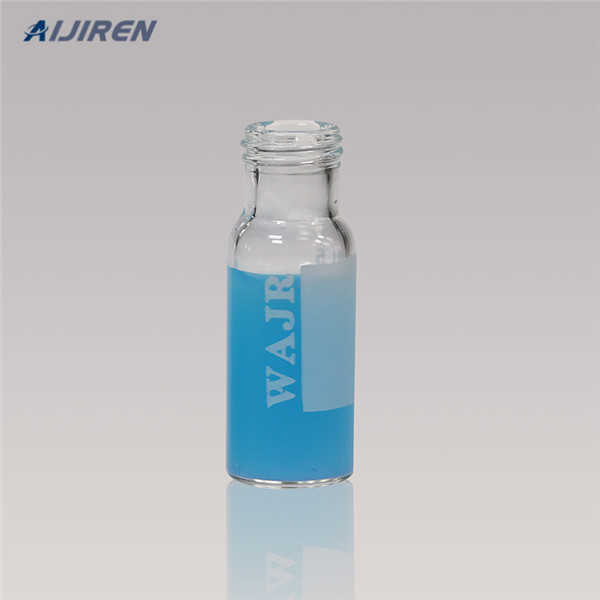
Clear glass lets you see the sample. That sounds trivial until you are troubleshooting a bubble at the bottom of a vial that the autosampler is drawing from. I keep clear vials in the method development lab for exactly this reason and switch to amber only when the analyte demands it.
Closures: caps, septa, and the torque question
The closure is where most vial failures originate. A cap is a plastic shell, usually polypropylene, with a septum bonded or pressed into it. The septum is the part the needle touches. The cap is the part the autosampler grips.
Screw caps
Screw caps come in 9 mm, 10-425, and 8-425 variants. The critical spec is the septum thickness and the cap height. A 9 mm cap with a 1.0 mm silicone/PTFE septum seats differently than one with a 1.5 mm septum, and the autosampler needle depth is calibrated to one or the other. Mixing them within a sequence is a reliable way to generate needle strikes.
Torque matters more than most people think. Hand-tightening with a torque wrench or a calibrated capper should land between 0.8 and 1.2 N·m for a 9 mm screw cap. Under-torque and the septum does not seal, so you get evaporation on a long sequence or a headspace leak. Over-torque and you crush the septum, which causes coring and can crack the neck. I have seen a lab torque to 2.0 N·m “for safety” and generate a coring rate above 30 percent on a 96-vial tray. The fix was a $60 torque driver and a written SOP.
Crimp caps
Crimp seals use an aluminum shell over a septum, closed with a crimper. The crimper needs to be adjusted to the specific vial and cap combination. A properly crimped 11 mm seal holds vacuum and resists evaporation for weeks. A poorly crimped one leaks from day one. The check is simple: after crimping, invert the vial and look for a gap between the cap skirt and the glass. If you can rotate the cap by hand, it is not sealed.
Crimp seals are single-use. Once crimped, they cannot be reopened without destroying the seal. That is a feature for long-term storage and a limitation for workflows where you need to add internal standard after sealing.
Septa: the material decision
The septum is the most under-specified component in most labs. It is also the one that most directly affects data quality.
- Silicone/PTFE (silicone backed with PTFE): the workhorse. PTFE faces the sample and is chemically inert; silicone provides resealability. Good puncture life, typically 50 to 100 punctures before coring risk rises. Standard for HPLC.
- PTFE/silicone/PTFE (sandwich): inert on both faces. Better for aggressive solvents and for headspace where the septum sees vapor on both sides.
- Butyl rubber: excellent gas barrier, poor solvent resistance. Used in headspace and some GC applications. Not for HPLC with organic mobile phases in contact.
- Natural rubber: cheap, high coring rate, extractables. I do not specify it for anything quantitative.
- Pre-slit septa: a slit cut into the septum to guide the needle. Reduces coring on multi-puncture sequences but increases evaporation. Use pre-slit only when puncture count is high and the sequence is short.
Puncture count is the number I put on the SOP. A standard silicone/PTFE septum is good for about 50 punctures in a 24-hour sequence before the coring rate climbs. If your autosampler runs 96 injections from one vial, you need a septum rated for that, or you need to split the sample across two vials. Most labs do not, and then they wonder why the last 20 injections show ghost peaks.
Matching the vial to the autosampler
The autosampler is the constraint. Every major platform has a preferred vial geometry, and the manufacturer’s documentation is the authority. Agilent publishes vial and cap compatibility for its LC and GC autosamplers in its chromatography consumables catalog, and Thermo Fisher does the same in its sample handling documentation. Read those before you buy, not after.
Common platform notes
Agilent 1260/1290 autosamplers accept 12 x 32 mm vials in 9 mm screw, 11 mm crimp, and 10-425 configurations depending on the tray. The 7697A headspace sampler uses 20 mL vials with 20 mm crimp or magnetic caps. Waters Alliance and ACQUITY systems favor 12 x 32 mm with 9 mm screw caps. Shimadzu and Thermo platforms vary by tray, so check the tray part number against the vial OD.
If you run multiple platforms, standardize on one vial geometry where possible and keep the exceptions documented. The cost of a mixed inventory is not the glass; it is the mis-pick at 2 a.m. when the analyst grabs the wrong box.
Volume, inserts, and micro-sampling
Standard 12 x 32 mm vials hold about 1.5 to 2.0 mL total, with a usable volume of roughly 1.2 mL before the autosampler needle runs dry. For smaller sample volumes, you use inserts.
- 300 µL insert: fits inside a standard 12 x 32 mm vial. Good for methods with limited sample.
- 150 µL insert: the practical floor for most autosamplers. Below this, needle depth and surface tension become the dominant error sources.
- Glass inserts versus plastic: glass for anything quantitative; plastic only for short-hold samples where adsorption is not a concern.
The failure mode here is the “hanging drop.” If the insert is not seated fully, or the sample volume is below the needle’s draw depth, the autosampler pulls air. I have seen a 40 percent RSD on peak area traced to a 150 µL insert that was 20 µL short of the needle depth. The instrument was fine. The fill volume was wrong.
For micro-volume work, the HPLC vial range at hplcgc.com includes inserts and caps sized to the standard 12 x 32 mm envelope, which matters when you are building a method that has to transfer between labs.
Headspace and GC: a different vial entirely
Headspace vials are not HPLC vials with a different label. They are typically 20 mL with a 20 mm crimp or magnetic cap, and the septum is chosen for gas barrier, not solvent resistance. Butyl and PTFE-faced butyl are common. The crimp must hold pressure at 80 to 150 °C for the duration of the headspace cycle, and a marginal crimp that passes at room temperature will leak at 120 °C.
If your workflow includes headspace, source those vials from a supplier who publishes the pressure and temperature rating. The headspace vial catalog at headspacevialsupplier.com lists the crimp and septum specs per SKU, which is the level of detail you need on a purchase order.
Purity, extractables, and the ghost peak problem
Every vial and septum contributes extractables to the sample. The question is how much and whether it interferes with your detection. For UV detection at 254 nm, most extractables are invisible. For LC-MS at low mass range, they are not.
I specify LC-MS grade vials and septa for any method using mass detection below about m/z 500. These are manufactured and packaged to lower the extractable profile, and the certificates show the relevant ions. The premium is real, typically 20 to 40 percent, and it is cheaper than re-running a failed batch.
The ghost peak checklist:
- Run a blank vial with mobile phase only. If you see peaks, the vial or septum is the source.
- Compare untreated versus deactivated glass with the same blank. A shift in the blank profile points to surface chemistry.
- Check the septum lot. Coring from a bad lot shows up as a series of peaks at regular retention times.
- Check the cap torque. Over-torqued caps crush the septum and increase extractables.
Restek publishes extractable and inertness data for its consumables in its technical resources, and it is a useful cross-check when a supplier’s certificate looks thin.
Regulatory and method references
If your lab works under a regulated method, the vial is part of the method. EPA SW-846 methods for waste and materials specify container and preservation requirements, and the SW-846 test methods are the reference for environmental work. USP general chapters cover container and closure requirements for pharmaceutical analysis. AOAC methods specify container types for food and agricultural work.
The practical translation: if the method says “amber glass, PTFE-lined cap,” you buy amber glass with a PTFE-lined cap. Substituting a different septum because it was in stock is a deviation, and it needs to be documented as one. Auditors find this. I have watched a 483 citation originate from a vial substitution that nobody thought was material.
Comparison: vial selection by workflow
Here is the decision table I use. It is not exhaustive, but it covers the workflows that account for most HPLC and GC sample handling.
- Routine reversed-phase HPLC, neutral or acidic analytes, >100 ng/mL: 12 x 32 mm clear borosilicate, 9 mm screw cap, silicone/PTFE septum, 1.0 mm thickness, torque 0.8 to 1.2 N·m. Cost per vial is the lowest of any configuration.
- Basic analytes, <10 ng/mL: 12 x 32 mm deactivated glass, 9 mm screw cap, PTFE/silicone/PTFE septum. Expect 15 to 30 percent premium over untreated.
- Photosensitive compounds: amber deactivated glass, same closure. Verify light transmission below 500 nm on the certificate.
- LC-MS, low mass range: LC-MS grade glass and septum, certificate of extractables on file, pre-cleaned.
- High puncture count (>50 per vial): pre-slit septum, or split the sample across two vials. Do not exceed 50 punctures on a standard septum.
- Headspace GC: 20 mL vial, 20 mm crimp or magnetic cap, butyl or PTFE-faced butyl septum, rated to 150 °C.
- Long-term storage (>72 hours): crimp seal, not screw cap. Crimp holds vacuum better; screw caps lose seal integrity over weeks.
- Micro-volume (<200 µL): 150 µL glass insert in a standard vial. Do not go below 100 µL without verifying needle depth.
The autosampler vial selection at autosamplerhplc.com follows this same logic, and the vial range at vials-filters.com carries the closure and septum combinations that match each row above.
Operational precautions that prevent most failures
Most vial failures I have investigated were not manufacturing defects. They were handling errors. The list below is what I put in the lab SOP.
- Torque every screw cap with a calibrated driver. Hand-tight is not a specification. Target 0.8 to 1.2 N·m and log it.
- Do not reuse crimp seals. Decrimping damages the neck and the next seal will not hold.
- Do not reuse screw caps more than once. The septum deforms and the seal degrades. If the sample matters, use a new cap.
- Fill to the specified volume. Under-fill causes air draw; over-fill causes overflow into the cap and cross-contamination.
- Seat inserts fully. A partially seated insert changes the needle depth by 1 to 2 mm, which is enough to miss the liquid.
- Store vials capped and upright. Open vials adsorb ambient contaminants within hours, especially in a lab with solvent vapors.
- Check the lot certificate on receipt. OD, height, septum thickness, and extractables profile. Reject lots outside tolerance.
- Rotate stock. Septa age. A five-year-old box of septa is not the same product as a fresh one.
Troubleshooting checklist
When a sequence fails and the vial is a suspect, work through this in order. It takes about 20 minutes and it isolates the cause without swapping the whole inventory.
- Needle strike or bent needle: check vial OD against tray well, check cap height against autosampler spec, check that cap and vial are the same thread standard. A 9 mm cap on a 10-425 vial will seat but the needle will hit the shoulder.
- Ghost peaks: run a blank vial, compare untreated versus deactivated glass, check septum lot for coring, check cap torque for over-compression.
- Low recovery on basic analytes: switch to deactivated glass, verify the septum is PTFE-faced toward the sample, check that the insert is glass not plastic.
- Drifting retention time over a long sequence: check for evaporation. Under-torqued screw caps or a failed crimp will concentrate the sample over hours. Weigh a filled vial before and after a 24-hour sequence; more than 1 percent mass loss is a leak.
- Air draw or low volume alarms: check fill volume against needle depth, check insert seating, check that the vial is the correct height for the tray.
- High RSD on peak area: check for bubbles at the bottom of the vial, check septum coring, check that the same vial geometry is used across the sequence.
What to put on the purchase order
This is the part most buyers get wrong. A purchase order that says “HPLC vials, 2 mL, qty 1000” will get you 1000 vials, and you will not know what you got until the first sequence fails. Specify the following:
- Dimensions: 12 x 32 mm, OD tolerance ±0.2 mm, height tolerance ±0.3 mm.
- Thread standard: 9 mm short-thread (or 11 mm crimp, or 10-425, as applicable).
- Glass: Type I borosilicate, clear or amber, deactivated or untreated.
- Closure: cap material, septum material and thickness, pre-slit or not.
- Purity grade: standard, LC-MS, or certified low-extractable.
- Certificate of analysis per lot, with dimensions and extractables profile.
- Packaging: vials and caps shipped separately or pre-assembled, and whether the packaging is cleanroom-compatible.
If the supplier cannot meet those specs on paper, they cannot meet them in the box. I have never regretted walking away from a supplier who could not produce a dimensional certificate. I have regretted staying with one.
Takeaway
The vial is a specified component of the analytical method, not a consumable you buy by the case. Match the glass chemistry to the analyte, the dimensions and thread standard to the autosampler, the septum to the puncture count and detection mode, and the torque to the closure design. Put those four decisions on the purchase order with numbers, and most of the vial-related failures in your lab disappear. The rest are handling errors, and those are fixed with an SOP and a torque driver.