I have watched a lot of autosamplers chew up a lot of vials over the years, and the failures almost always trace back to something predictable. A septa that was the wrong durometer. A cap torqued by hand instead of by tool. A glass vial bought on price per thousand and not on dimensional tolerance. None of these problems are exotic. They are the same six or seven failure modes repeating across labs, and each one has a measurable root cause you can fix.
This article is the field guide I wish I had when I started running a consumables operation. It covers what actually goes wrong with HPLC vials in daily use, why it happens at the component level, and the specific numbers that keep it from happening again. I will use real dimensions, temperature ratings, puncture counts, and torque values. Where a standard applies (GPI 8-425, GPI 13-425, GPI 24-400, USP <661> glass types), I will name it.
When a run fails, the first instinct is to blame the column or the mobile phase. In my experience the vial is the culprit more often than people admit, and when it is, the mechanism is rarely a chemical incompatibility. It is almost always a fit problem: the vial does not seal, does not seat, does not sit at the right height, or does not survive the needle. Chromatography consumables are dimension-critical parts, and a 0.2 mm deviation in a neck finish is enough to change a result.
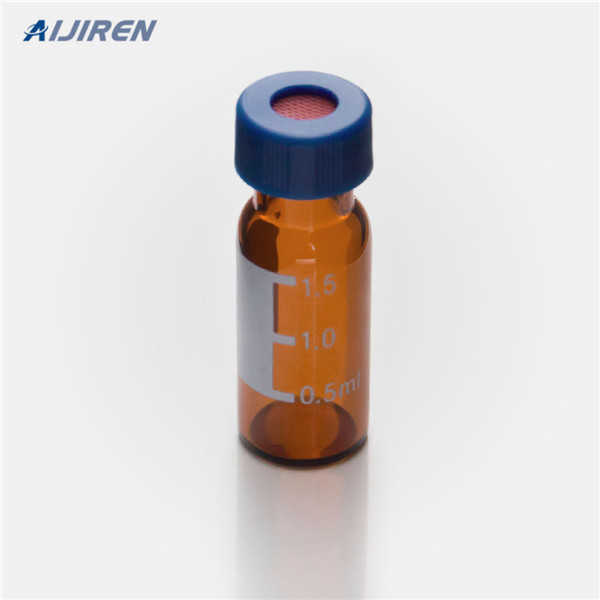
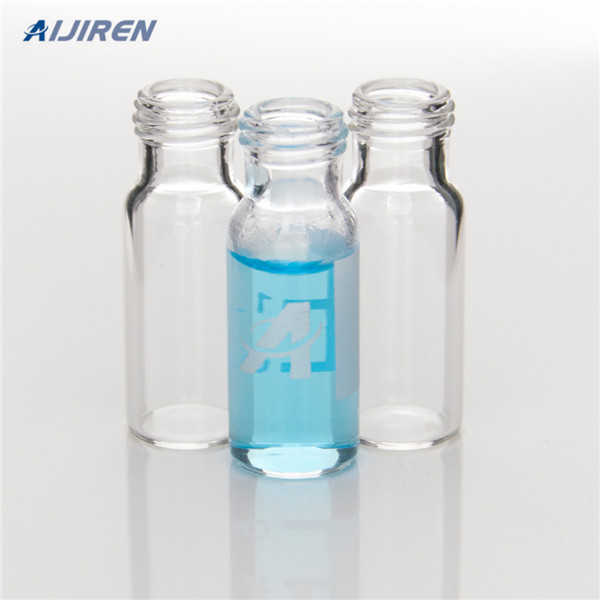
The neck finish is the place to start. A standard 2 mL HPLC vial uses a GPI 8-425 screw thread (8 mm diameter, 425 thread pitch spec). The 12 x 32 mm format is the workhorse: 12 mm outer diameter, 32 mm height, 2 mL nominal capacity, 1.5 mL usable. The 9 mm wide-mouth format (GPI 9-425) uses a 9 mm thread and a 6 mm opening, which is what most modern autosamplers with robotic grippers want. Crimp-top vials use an 11 mm aluminum seal. Get the thread class wrong, or mix a cap from one supplier with a vial from another, and the seal is a coin flip.
Failure 1: septa coring and needle punch-through
Coring is the most common failure I deal with, and it is the easiest to diagnose because you can see it. A silicone or silicone/PTFE septa that has been punched too many times, or punched by a blunt or burred needle, sheds fragments into the vial. Those fragments end up in the needle, in the injection port, or on the column frit. A single cored septa can plug a 0.2 µm frit and cause a pressure spike that ruins a run.
What causes it
- Puncture count. A standard silicone/PTFE septa is rated for roughly 3 to 5 punctures in a 9 mm cap before it should be replaced. Pre-slit septa tolerate more, but the slit is a leak path, so you trade coring risk for evaporation risk.
- Needle condition. A bent or burred needle cores a septa on the first punch. Inspect needles weekly under a loupe.
- Septa durometer. Soft silicone (around 40 Shore A) seals well but cores easily. A 50 to 55 Shore A silicone with a PTFE face is the better compromise for autosamplers.
- Off-center needle penetration. If the vial is not centered under the needle, the needle hits the aluminum crimp or the cap edge and tears the septa.
How to prevent it
Use pre-slit septa only where evaporation is not a concern (short runs, ambient temperature). For long sequences, use a solid PTFE-faced silicone septa and change caps every 4 injections on a 9 mm cap, or move to a vial format with a larger septa area. On crimp vials, use a proper crimping tool set to the correct jaw height; a hand crimp that is too deep deforms the septa and pre-loads it so it cores on the first punch. I keep a crimper gauge on the bench and check it monthly.
If you are running a robotic autosampler, the autosampler vial format matters here. Wide-mouth 9 mm vials give the needle more room to enter without grazing the neck, which cuts coring dramatically compared with narrow 8 mm necks.
Failure 2: evaporation and sample concentration drift
Evaporation is the silent failure. The vial looks fine, the septa looks fine, but the sample has lost 5 to 15 percent of its volume over a 12-hour sequence, and every quantitation result drifts high. I have seen this bite labs running volatile analytes in methanol or acetonitrile on a 96-position tray where the tray sits at ambient for 20 hours.
Root causes and numbers
- Loose cap torque. A screw cap that is under-torqued leaks. The target for a 9 mm screw cap is 0.9 to 1.1 N·m (roughly 8 to 10 inch-pounds). Hand-tightening is inconsistent; use a torque wrench or a capping station.
- Over-torque. Above about 1.4 N·m you deform the septa and crack the neck on thin-wall vials. Both leak.
- Wrong septa for the solvent. A plain silicone septa is permeable to many solvents. A PTFE-faced septa cuts permeation by an order of magnitude.
- Tray temperature. A sample tray held at 4 °C condenses moisture on the vial exterior and can wick into the cap if the seal is marginal. Keep the tray at 10 °C if your method allows.
The fix is mechanical: torque to spec, use PTFE-faced septa, and cap immediately after filling. If you are running a long sequence, use a vial with a thicker septa (1.5 mm vs 1.0 mm) and re-check weights at the start and end of the run.
Failure 3: glass breakage and autosampler crashes
Glass breakage is expensive because it takes the autosampler down with it. A cracked vial in a carousel jams the gripper, and a jammed gripper means a service call and a lost day. In my experience, breakage is almost never the glass itself. It is dimensional mismatch or mechanical stress.
The three breakage patterns I see
- Neck cracks at the thread root. Caused by over-torque on a thin-wall vial. A 12 x 32 mm vial with a 1.0 mm wall is more forgiving than a 0.6 mm wall vial, but the 0.6 mm vial is cheaper. Buy the thicker wall for anything that gets capped by hand.
- Base cracks from height mismatch. If the vial is 0.3 mm too tall for the tray, the gripper crushes it against the stop. Always verify the 32.0 ± 0.2 mm height against the autosampler’s tray spec.
- Thermal shock. Moving a vial from a -20 °C freezer straight to a 40 °C tray cracks borosilicate. Let samples equilibrate for 30 minutes.
Glass type matters too. USP <661> Type I borosilicate is the standard for HPLC because it has low extractables and good thermal shock resistance. Type III soda-lime is cheaper but leaches alkali, which shifts pH and can corrode the needle. For trace analysis at ppb levels, Type I is not optional.
Failure 4: extractables and background contamination
This one is subtle and it will ruin a method validation. The vial contributes peaks. I have traced ghost peaks at 210 nm to a low-grade septa, and I have traced sodium and potassium background to soda-lime glass. If you are running gradient HPLC with UV detection below 220 nm, the vial is part of your blank.
What leaches and how to control it
- Septa plasticizers. Low-cost silicone can contain phthalates and other plasticizers that leach into acetonitrile. Use a PTFE-faced septa and run a vial blank with your mobile phase before every method validation.
- Glass extractables. Type I borosilicate leaches far less than Type III. For LC-MS at low ppb, use a deactivated glass vial or a polypropylene vial if the analyte allows.
- Cap liners. Aluminum crimp seals with a PTFE liner are the cleanest option for volatile and trace work.
The practical test: fill three vials with your mobile phase, cap them, and inject after 0, 4, and 24 hours. If you see new peaks or a rising baseline, the vial is the source. I do this once per lot of vials, not once per box.
Failure 5: needle and septa interaction in headspace and GC
Headspace is a different animal. The headspace vial is crimped, not screwed, and the seal is an 11 mm aluminum crimp with a butyl or PTFE-faced butyl septa. The failure modes are crimp depth and septa bleed.
Crimp depth and temperature
A headspace crimp that is too shallow leaks; too deep and it cuts the septa. The target crimp height for an 11 mm aluminum seal is about 5.5 mm measured at the crimp skirt, and the crimper should be set so the seal is fully rolled but the septa is not compressed more than about 30 percent. Check with a crimp gauge, not by feel.
Temperature rating is the other trap. A standard butyl septa is good to about 120 °C. Above that, use a PTFE-faced or a high-temperature septa rated to 200 °C. If you run headspace at 150 °C with a standard septa, you will get bleed peaks and a shortened septa life. The Restek technical resources have good septa selection charts by temperature and analyte class; I keep the PDF on the bench.
Failure 6: autosampler positioning and vial height errors
Modern autosamplers are picky about vial geometry. A vial that is 0.5 mm off in height, or a cap that is 0.3 mm too tall, will cause a gripper miss or a needle that does not reach the sample. This is the failure that generates the most service calls and the least useful error messages.
The dimensional checklist
- Height: 32.0 ± 0.2 mm for a 12 x 32 mm vial. Verify with calipers on a sample of 10 from each lot.
- Outer diameter: 12.0 ± 0.2 mm. A vial that is 12.3 mm will not seat in a 12.1 mm tray pocket.
- Cap height: a 9 mm screw cap adds about 6.5 mm to the total height. Confirm the autosampler’s total-height spec.
- Neck concentricity: the needle should enter within 0.5 mm of the vial center. A vial with an off-center neck will graze the needle.
I keep a go/no-go gauge on the bench and check every new lot. It takes two minutes and it has saved me more than one crash. If you buy from multiple suppliers, standardize on one vial format and one cap, and do not mix them. Cross-supplier mixing is the single biggest cause of positioning failures I see.
A comparison: vial format selection by application
Here is the decision table I use when a lab asks which vial to standardize on. The numbers are the ones that matter for autosampler compatibility and seal integrity.
Vial format comparison
- 2 mL 12 x 32 mm, 8 mm neck (GPI 8-425): 2 mL capacity, 1.5 mL usable, 8 mm opening. Best for older autosamplers and manual injection. Septa puncture life 3 to 5. Cheapest per unit. Not ideal for robotic grippers.
- 2 mL 12 x 32 mm, 9 mm wide-mouth (GPI 9-425): 2 mL capacity, 1.5 mL usable, 6 mm opening. Best for modern autosamplers with robotic grippers. Septa puncture life 4 to 6 with pre-slit, 3 to 5 solid. The default choice for most HPLC labs.
- 2 mL 11 mm crimp: 2 mL capacity, 11 mm aluminum seal. Best for volatile analytes and long sequences. Septa puncture life 3 to 5. Requires a crimper and a crimp gauge.
- Headspace 20 mL, 11 mm crimp: 20 mL capacity, 11 mm aluminum seal, butyl or PTFE-faced butyl septa. Temperature rating 120 °C standard, 200 °C high-temp. Best for GC headspace.
- 4 mL 15 x 45 mm: 4 mL capacity, 13 mm neck (GPI 13-425). Best for larger sample volumes and prep workflows. Check autosampler tray height before buying.
My recommendation for a general HPLC lab: standardize on the 9 mm wide-mouth screw vial with a PTFE-faced silicone septa, torque to 1.0 N·m, and change caps every 4 injections. It is the best balance of seal integrity, autosampler compatibility, and cost. If you run volatile analytes, move to the 11 mm crimp with a PTFE-faced septa and a calibrated crimper.
Troubleshooting checklist
When a run fails and you suspect the vial, work through this list in order. It takes about 15 minutes and it catches 90 percent of vial-related problems.
- Visual: inspect the septa for coring, the cap for cracks, and the glass for chips at the neck. Replace any vial with a visible defect.
- Torque: check cap torque with a torque wrench. Target 0.9 to 1.1 N·m for 9 mm screw caps. Re-cap anything outside spec.
- Dimensional: caliper 10 vials from the lot for height (32.0 ± 0.2 mm) and outer diameter (12.0 ± 0.2 mm). Reject the lot if more than one is out.
- Seal test: weigh a filled, capped vial, leave it 24 hours at tray temperature, and re-weigh. More than 1 percent weight loss means a leak.
- Blank injection: fill three vials with mobile phase and inject at 0, 4, and 24 hours. New peaks or a rising baseline point to extractables.
- Needle inspection: check the needle for burrs and bends under a loupe. A burred needle cores septa on the first punch.
- Crimp gauge: for crimp vials, check crimp height (about 5.5 mm for 11 mm seals) and septa compression (no more than 30 percent).
- Temperature: confirm the tray temperature is within the septa’s rating. Standard butyl tops out at 120 °C.
Where to buy and what to specify
When you write the purchase spec, put the numbers in it. Specify USP <661> Type I borosilicate glass, 32.0 ± 0.2 mm height, 12.0 ± 0.2 mm outer diameter, GPI 9-425 thread for wide-mouth, and a PTFE-faced silicone septa at 50 to 55 Shore A. Ask for a certificate of analysis with dimensional data per lot. If a supplier cannot provide it, that is your answer.
For method development and regulatory work, cross-check against the source methods. The U.S. EPA SW-846 test methods specify vial and septa requirements for waste and materials analysis, and the major instrument vendors publish autosampler-specific vial specs. Agilent chromatography consumables and Thermo Fisher chromatography and sample handling both publish dimensional drawings for their autosampler trays; match your vial to the drawing, not to the marketing photo.
Takeaway
Vial failures are mechanical problems with measurable causes: septa coring from too many punctures, evaporation from under-torque, breakage from dimensional mismatch, extractables from the wrong glass type, and positioning errors from non-standard geometry. Fix them by specifying the numbers (32.0 ± 0.2 mm height, GPI 9-425 thread, 1.0 N·m torque, 4-injection septa life, Type I borosilicate) and by checking every lot with calipers and a torque wrench. The vial is a precision component, not a disposable cup. Treat it that way and the failures stop.
References & further reading
Related resources from our lab consumables network:
- Hplc Vial at hplcgc.com
- Autosampler Vial at autosamplerhplc.com
- Vial at vials-filters.com
- Headspace Vial at headspacevialsupplier.com
External references and standards: