Last spring a QC lab running USP <621> assay on a 12-hour overnight sequence came back to a rack where 18 of 96 vials had lost between 4.1 and 6.8 mg of mobile phase against a tare weight captured at 08:00. The peaks for the late-eluting compounds had drifted +0.7% in retention time and the internal standard area RSD had climbed from 0.4% to 2.3% across the run. The method was fine. The column was fine. The hplc vial seal failure was the whole story, and it had been happening quietly for months because nobody weighed the vials.
This is not a piece about why vials matter. It is a piece about the specific mechanisms by which a septum stops sealing, how to prove it with a balance, and what to change when you do. If you already know your way around a 12 x 32 mm vial, this is the part of the problem that most labs never measure.
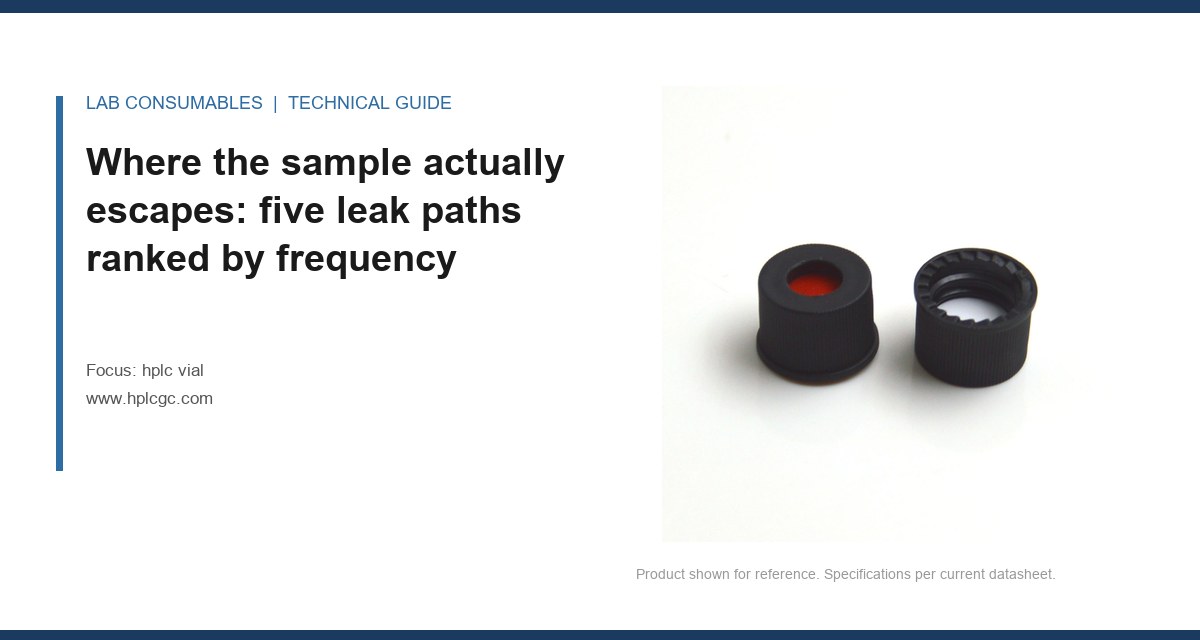
I have pulled a lot of vials off autosamplers after a failed run and looked at them under a loupe. The leak paths are not random. They fall into a short list, and the frequency ranking is stable enough that I use it as a triage order.
- Septum-to-cap compression loss (most common). The elastomer has taken a permanent set and no longer presses against the glass neck. A 1 mm gap on a 5.5 mm ID neck is a leak you cannot see but can weigh.
- Cap-to-neck thread engagement. The cap is cross-threaded, under-torqued, or the wrong thread pitch. It looks seated. It is not.
- Puncture channel re-seal failure. The needle went in and the slit did not close. This is the one that matters most for overnight runs and the one most labs underestimate.
- Glass neck damage. A chipped or out-of-round sealing surface at the top of the neck. Usually a crimp or handling problem, sometimes a lot problem.
- Cap skirt cracking. A polypropylene cap that has been crimped or torqued past its yield point. Rare on screw caps, common on crimp caps that were set with a worn jaw.
Rank matters because the fix is different for each. Torquing harder solves path two and makes path five worse. Buying a thicker septum solves path three and does nothing for path one. You need to know which one you have before you spend money.
Re-seal behaviour after puncture is where overnight runs fail
A septum is a slit-sealing device, not a hole-sealing device. When the needle punches through, the elastomer is displaced laterally, and when the needle withdraws the material has to flow back and close the slit under its own elastic recovery. The quality of that recovery depends on the elastomer type, the needle gauge, the number of punctures, and the dwell time the needle spent in the vial.
What the numbers look like by septum type
The two septum materials you will meet on an HPLC autosampler are silicone (usually silicone with a PTFE face) and chlorobutyl or butyl rubber. Silicone recovers well from a single puncture because it has high elastic recovery and a low compression set. It also has the highest gas permeability of any common septum material, which is why a silicone-only septum on a volatile mobile phase is a bad idea. The PTFE-faced silicone sandwich is the standard compromise: PTFE on the sample side for chemical resistance, silicone behind it for re-seal.
Chlorobutyl has lower permeability and better re-seal than silicone under repeated puncture, which is why it is the default on headspace vial closures and increasingly on long-sequence HPLC work. The trade-off is higher compression set at elevated temperature.
| Septum type | Typical thickness | Re-seal after 1 puncture | Re-seal after 5 punctures | Permeability (relative) |
|---|---|---|---|---|
| PTFE-faced silicone, 1.0 mm | 1.0 mm | Excellent | Good to fair | High |
| PTFE-faced silicone, 1.5 mm | 1.5 mm | Excellent | Good | High |
| Chlorobutyl, 1.0 mm | 1.0 mm | Excellent | Excellent | Low |
| PTFE/silicone pre-slit | 1.0 mm | Good (slit already open) | Poor | High |
| Natural rubber (rare on HPLC) | 1.0 mm | Fair | Poor | Moderate |
Pre-slit septa are sold as a solution to coring, and they are, but they are a liability for evaporation. The slit is a permanent leak path. If your method runs acetonitrile-rich mobile phase overnight at 25 °C, a pre-slit septum on a 2 mL vial can lose measurable mass in a few hours. I do not use pre-slit septa on sequences longer than about four hours unless the sample is thermally stable and the mobile phase is mostly aqueous.
Puncture count is a real specification, not marketing
Most manufacturers rate a septum for a puncture count, typically 3 to 5 punctures for a standard silicone sandwich and up to 10 for a heavier chlorobutyl. That number assumes a clean needle, a straight insertion path, and a septum that has not been sitting in a hot autosampler tray for a week. In practice I treat the rated count as a ceiling and plan for half of it. If a method needs six injections from the same vial, I want a septum rated for at least twelve, or I want a fresh vial.
Compression set is the mechanism behind the slow leak
Compression set is the permanent deformation an elastomer takes when it is held under load. A septum that has been compressed against a glass neck for a week at 40 °C in an autosampler tray has taken a set. When the cap is loosened or the vial is re-seated, the septum does not spring back to its original thickness. It stays thin, the cap no longer loads it, and the seal is gone.
The numbers matter. A typical 1.0 mm silicone septum under a screw cap sees roughly 20 to 30% compression at the recommended torque. If the material has a compression set of 25% after 24 hours at 70 °C (a common test condition for silicone), it will lose a quarter of its thickness over that period. A quarter of 1.0 mm is 0.25 mm, and 0.25 mm of lost compression on a 5.5 mm ID neck is more than enough to open a leak path on a volatile solvent.
This is why I tell people to tighten the cap once, not twice. A cap that is loosened and re-torqued is loading a septum that has already taken a set in the first position. The second seal is worse than the first, and the third is worse still. If you need to re-open a vial, use a fresh cap and septum.
Temperature accelerates the set
Autosampler trays that sit at 4 °C are kind to septa. Trays at ambient are fine for a day. Trays at 40 °C, which many labs use to keep viscous samples flowing, will take a set out of a silicone septum in about 12 hours. If your method requires a heated tray, move to chlorobutyl and expect to replace caps every sequence.
How to measure evaporation loss gravimetrically over a run
This is the part most labs skip, and it is the part that turns a suspicion into a number. The method is simple enough to run in an afternoon with a balance that reads to 0.1 mg.
The procedure
- Condition the balance in the room where the autosampler sits. Let it stabilize for at least an hour. Record the ambient temperature and humidity.
- Tare a set of empty vials with caps and septa in place. Record each tare to 0.1 mg.
- Fill each vial with the exact volume your method uses (typically 1.0 or 1.5 mL in a 2 mL vial). Use the same mobile phase or diluent the method uses. Cap and torque to your standard setting.
- Weigh each filled vial immediately. This is your time-zero mass.
- Place the vials in the autosampler tray in the same positions your sequence uses. Run a dummy sequence with the same needle movements, or leave the tray idle if you want to isolate diffusion from puncture.
- Weigh at 1, 2, 4, 8, and 12 hours. Return each vial to the same tray position within 30 seconds of weighing.
- Plot mass loss in mg against time. A linear slope is diffusion through the septum. A step change at a puncture time is a re-seal failure.
Run the test twice: once with no punctures and once with a needle puncturing each vial at the frequency your method uses. The difference between the two curves is your puncture-driven loss, and it is usually the larger number.
What the numbers should be
On a properly sealed 2 mL vial with a 1.0 mm PTFE/silicone septum, filled with 1.0 mL of 50:50 acetonitrile/water and held at 25 °C, I expect less than 1 mg loss over 12 hours. On a chlorobutyl septum, less than 0.5 mg. If you are seeing 3 to 5 mg over 12 hours, you have a seal problem, not a diffusion problem.
For a volatile solvent like methanol or dichloromethane, the acceptable loss is higher because the permeability is higher, but a 2 mL vial with 1.0 mL of methanol should still hold under 5 mg over 12 hours at ambient. If it does not, the septum is the first thing I check.
Two field cases where the balance found what the chromatogram could not
Case one: the drifting internal standard
A contract lab running a 96-well plate of 2 mL vials on a Waters autosampler saw the internal standard area fall by 3.8% from the first injection to the last over a 10-hour sequence. Retention times were stable, peak shapes were fine, and the column had been replaced twice. The chromatogram looked like a detector drift problem.
I asked them to weigh the plate before and after a dummy sequence. The late-position vials had lost an average of 5.2 mg, the early-position vials 1.1 mg. The loss correlated with tray position, not with sample chemistry. The cause was a batch of caps with a 0.9 mm septum instead of the specified 1.0 mm, combined with a torque setting that had been dialed down to “finger tight” by a new analyst. The thinner septum plus the lower torque meant the cap was barely loading the septum at all. Fix: back to 1.0 mm septa, torque set to 0.6 N·m with a calibrated driver, and a weekly gravimetric check on the first and last vial of each plate. The internal standard RSD dropped to 0.5%.
Case two: the 4 °C tray that was not cold enough
A pharmaceutical stability lab ran a method with a 4 °C autosampler tray and saw a slow rise in the peak area of a volatile analyte over an 8-hour sequence. The analyte was not degrading. It was concentrating. The vials were losing diluent through the septum, and the sample was getting more concentrated as the run went on.
The gravimetric test showed 2.9 mg loss over 8 hours on vials in the front row of the tray, and 6.4 mg on vials in the back row. The back row was closer to the tray’s defrost cycle vent. The temperature cycling was driving the compression set faster than the steady 4 °C would have. The fix was a chlorobutyl septum and a change to a tray position that was not in the defrost path. Loss dropped to under 1 mg over 8 hours and the peak area drift disappeared.
Neither case would have been found by looking at the chromatogram alone. Both were found by putting the vials on a balance.
A troubleshooting checklist for seal integrity and evaporation loss
When a sequence shows drift, loss, or a rising internal standard, I work through this list in order. It takes about 40 minutes and it eliminates the vial as a variable before anyone touches the instrument.
- Weigh the first and last vial of the sequence. If the difference is more than 2 mg over 8 hours, you have a loss problem. Go to step two.
- Check the septum thickness against the specification. A 0.9 mm septum in a cap designed for 1.0 mm is a silent failure. Measure with a caliper on five caps from the lot.
- Check the torque. A calibrated cap driver should read 0.5 to 0.7 N·m for a standard 9 mm screw cap. Below 0.4 N·m the septum is under-loaded. Above 0.8 N·m you risk cracking the cap skirt.
- Count the punctures. If any vial has more than five, replace it. If the method needs more, move to a chlorobutyl septum or a larger vial.
- Look at the septum under a loupe. A slit that has not closed, a tear at the edge of the puncture, or a visible dimple from over-torque are all visible at 10x.
- Check the cap thread engagement. A cap that spins freely after one turn is cross-threaded. Discard it.
- Confirm the septum material matches the solvent. Silicone swells in non-polar solvents. PTFE-faced silicone is the default for reversed-phase; chlorobutyl for headspace and long sequences.
- Re-run the gravimetric test with the fix in place. If the loss is still above 2 mg over 8 hours, the problem is not the vial.
If you want a reference for the torque and dimension conventions, the Hplc Vial specification pages on our site list the standard 9 mm and 11 mm closure dimensions, and the Autosampler Vial pages cover the tray-position and needle-geometry variables that affect puncture count. The Vial reference material covers the glass neck tolerances that determine whether the cap seats at all.
What to specify when you buy, and what to check when it arrives
The purchase decision is simpler than the troubleshooting. Buy a septum that matches the solvent and the sequence length, and buy a cap that matches the septum thickness. The specification I use for a standard reversed-phase HPLC method with a 12-hour sequence is:
- Vial: 12 x 32 mm, clear glass, 2 mL, with a 9 mm screw thread, neck ID 5.5 mm, neck OD 8.0 mm, neck height 5.5 mm. Confirm the neck dimensions against the tolerance block on the certificate, not the nominal drawing.
- Cap: 9 mm polypropylene screw cap, open-top or closed-top depending on needle access, with a 1.0 mm PTFE-faced silicone septum for reversed-phase, or 1.0 mm chlorobutyl for headspace and long sequences.
- Torque: 0.6 N·m, applied with a calibrated driver, once. Do not re-torque.
- Puncture count: plan for no more than 3 punctures per vial on silicone, 5 on chlorobutyl.
- Temperature: keep the tray at ambient or 4 °C. If you need 40 °C, use chlorobutyl and replace caps every sequence.
On receipt, weigh ten vials from the lot empty, then fill and weigh again after 8 hours at ambient. If the average loss exceeds 2 mg, reject the lot. This is a 30-minute incoming inspection that catches the thin-septum and under-torque problems before they reach a sequence. For the regulatory context on why this matters to the method, the U.S. EPA SW-846 test methods and the sample-handling guidance from Agilent and Thermo Fisher all assume the vial is a closed system. It is only closed if the septum is doing its job. The technical notes at Restek are a useful cross-check on septum material selection for specific solvent classes.
Decision table for common methods
| Method type | Sequence length | Recommended septum | Max punctures | Expected loss (12 h, 25 °C) |
|---|---|---|---|---|
| Reversed-phase, aqueous-rich | Up to 12 h | 1.0 mm PTFE/silicone | 3 | < 1 mg |
| Reversed-phase, high organic | Up to 12 h | 1.5 mm PTFE/silicone | 3 | < 2 mg |
| Headspace | Single injection | 1.0 mm chlorobutyl | 1 | < 0.5 mg |
| Long sequence, ambient tray | 12 to 24 h | 1.0 mm chlorobutyl | 5 | < 1 mg |
| Heated tray (40 °C) | Up to 8 h | 1.0 mm chlorobutyl, fresh caps | 3 | < 2 mg |
The decision rule is this: if you cannot state the septum material, the septum thickness, and the torque value for the vials on your autosampler right now, you do not have control of the seal, and you cannot attribute drift to the instrument until you do. Weigh ten vials, measure five septa, and torque-check the driver. That is the whole audit. The chromatogram will tell you the rest.
References & further reading
Related resources from our lab consumables network:
- Hplc Vial at hplcgc.com
- Autosampler Vial at autosamplerhplc.com
- Vial at vials-filters.com
- Headspace Vial at headspacevialsupplier.com
External references and standards: